Friday, June 20, 2014

ZBrush Final Progress Report

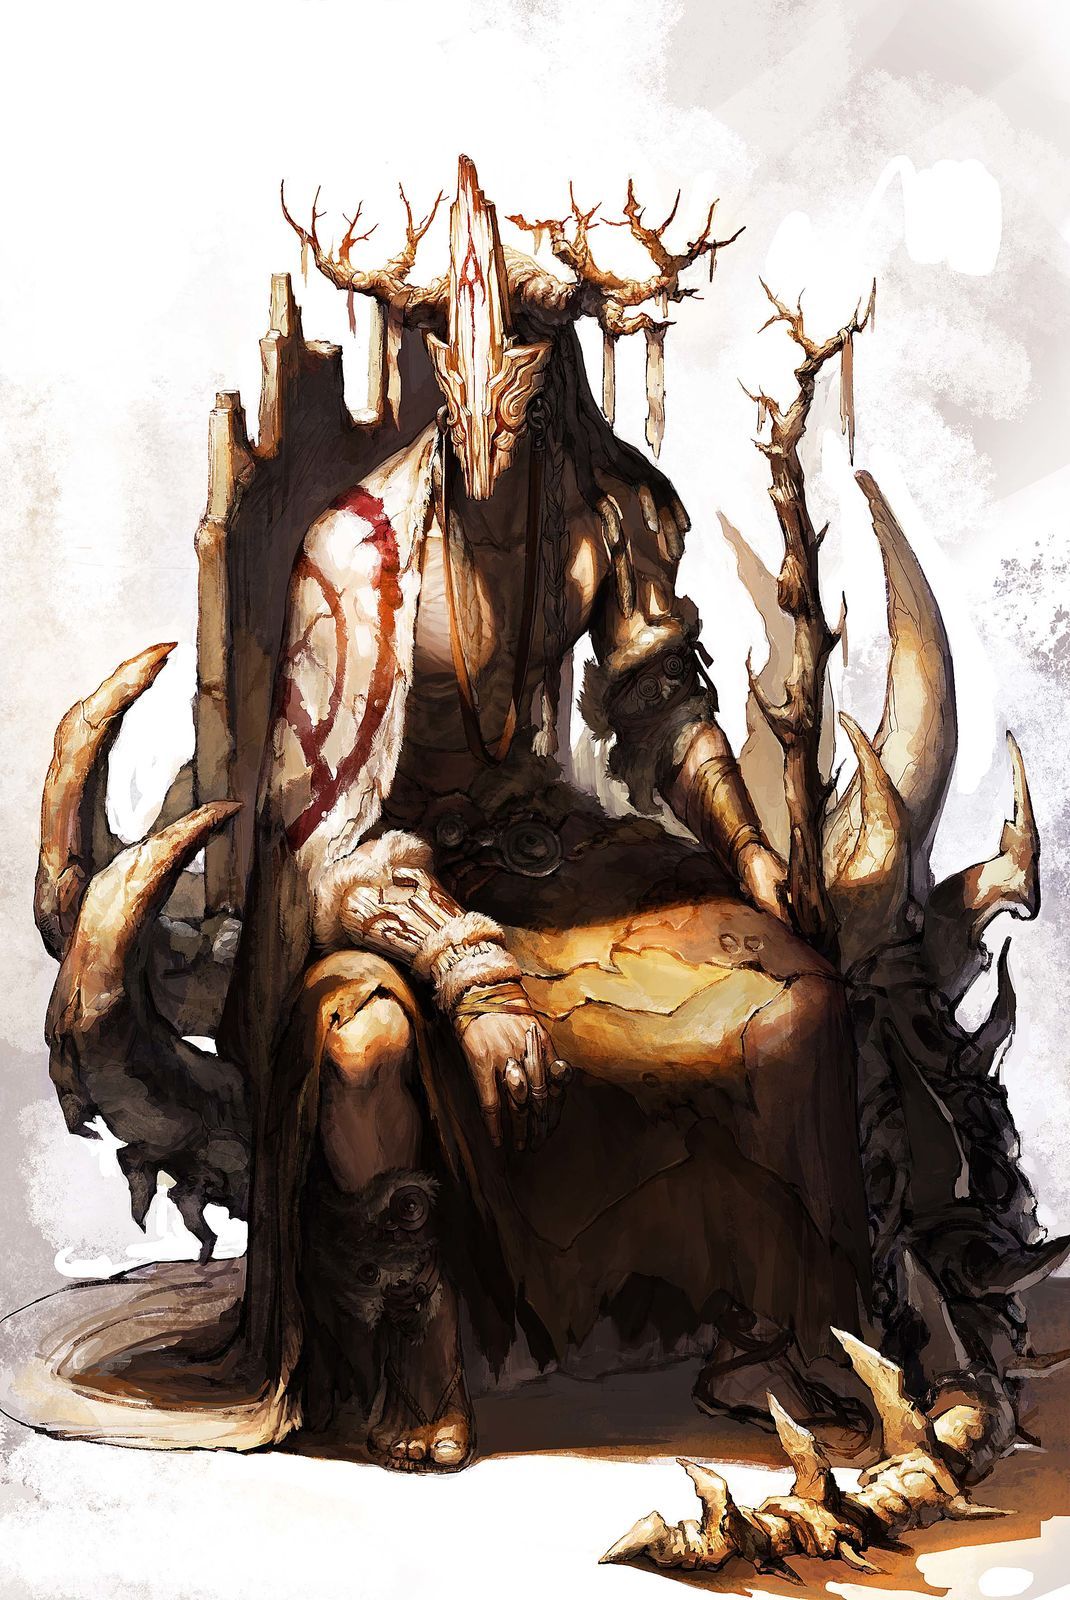
For the final project, we have to take a piece of concept art and make it in ZBrush. We have to have both a character and environment they are contained in. This is the dude guy I'm going to make;


Here is a link to my concept board. These are just different images to help me compose and craft the different parts of the character in the artwork. As well, here is a gallery to show how far I've come in one week so far.

I feel things are coming together pretty decently. This is around 15 hours of work. Next up I plan on working on his head. So the mask, braids, dread lock things, and antlers? are coming up. Then it'll probably be the furs and leathers, and after that, minor detailing and moving onto the environment.

Monday, June 16, 2014

Project Two: Robot / Mech


For our second project, we had to do a hard surface model of a mech or robot. I went with Megas XLR from the show of the same name. This proved difficult at first when I tried building another ZSphere armature, so instead I went with a base mesh modeled in Maya first that helped out a whole lot. What I did the most here was to separate everything into different sub tools, and sculpt them all on their own. As well, I was able to insert small cylinders and other parts into the mesh without having to worry about sculpting them from the base mesh. I found this project to be mostly successful. I lost some time messing around with the ZSpheres are first, but I was still able to do a lot of work and get something that looks a bit Similar to the actual mech. This took at least 25 hours of time, but I learned a ton and found some good techniques that I can use for other projects down the line. I plan on painting it, so I can cap it all off and have it be done.
Lab Three: Jewelry


For the third lab, we were focused on using what is called Panel Loops, a function in ZBrush which works right off of Polygroups. A good way to think about it is taking separate groups in your mesh and adding edges, or panels, between them with a bevel. As well, you can take a flat mesh and build it out into a full 3D form. In these pictures, I made the Ring of Blades from Dark Souls 2. The engravings are all from simple panel loops. I just had to draw the shapes out, make sure there was no extra mesh, and run the tool. There is also the Stone Ring I tried making first, but it did not turn out as well as I had hoped.
Project One: Cartoon Character

 Out first project for the Summer ZBrush class was a cartoon character. I chose Archer because I thought he would be simple enough to pull off, but it turned out more difficult than I had anticipated. While it came out decently, there are obvious flaws that I'm not quite so sure how to fix yet. I think I would be better off starting from scratch. This was a great project because I learned a lot with the different sculpting tools that ZBrush has to offer as well as working with what is call Dynamesh. In total, this project took between 15-20 hours. Even though it was a difficult choice, I had fun sculpting out Archer.
Second ZBrush Lab: An Animal


For the second lab, we had to sculpt the form of an animal. Anything we wanted to. I decided to make a HORRIFYING TENTACLE MONSTER from Dark Souls 2 because I thought it would be fun. It worked out pretty well, but I was hoping to get a bit more done with the oil or whatever it's in in detail and paint. The first picture is the concept art, second is the armature, third is the drawn ZSphere, four is the base mesh, and the last few are the final result. This took around 12-15 hours to complete. This was a good assignment because it helped me learn about moving around the mesh pretty heavily off the base mesh and still making it look decent.
First ZBrush Lab: Make Anything.


For the first ZBrush lab, we could make anything we wanted to. We were encoureged to go over ZSpheres and sculpting, but there weren't any real guidelines. I've always seen ZBrush used for characters, so I deiced to make my own. Wasn't really sure what I was making until I got finished with the mesh. Went with a good ol' Battle Toads ripoff sort of thing. Still not sure what it is, but I had fun making it and I learned quite a lot. The first image is what is called an armature made with Zspheres, the second is added on drawn ZSpheres, and the final is the sculpted mesh along with painted colors.